
| 일 | 월 | 화 | 수 | 목 | 금 | 토 |
|---|---|---|---|---|---|---|
| 1 | 2 | 3 | 4 | 5 | ||
| 6 | 7 | 8 | 9 | 10 | 11 | 12 |
| 13 | 14 | 15 | 16 | 17 | 18 | 19 |
| 20 | 21 | 22 | 23 | 24 | 25 | 26 |
| 27 | 28 | 29 | 30 |
- uncheck Exception
- @IdClass
- 인텔리제이
- 스프링 부트 공식 문서
- JPA
- 빈생성안됨
- 스프링부트오류
- jwt메서드
- Spring Spring boot 차이
- 1차캐시
- 복합키
- Q 클래스
- 스프링 부트 기능
- REST란
- spring서버
- git
- ERD 작성
- queryDSL
- JoinColumn
- json gson 차이
- jpa회원가입
- 최종 프로젝트
- jpa에러
- REST API 규칙
- Unsatisfied dependency
- Error creating bean with name
- json
- github
- Filter
- JPA주의사항
- Today
- Total
Everyday Dev System
ORM과 JPA 활용 본문
1. ORM이란?
- 객체와 DB를 맵핑해주는 도구.
2. JPA란?
- 자바, ORM 기술의 대표적인 표준 명세
- ORM 기술 중에 가장 표준적인 기술
- JPA를 실제로 구현한 Framework 중 사실상 표준이 Hibernate이다.
스프링 부트에서 기본적으로 Hibernate 구현체를 사용중.
- JPA는 애플리케이션 서버와 JDBC 사이에서 동작이 된다.
1) @Entity는 JPA가 관리할 수 잇는 Entity Class로 지정하는 어노테이션
@Entity(name = "memo")
JPA가 Entity Class를 인스턴스화 할 때 기본 생성자를 실행하므로 클래스 내에 기본 생성자 반드시 기재해야 함.
아래는 오버로딩된 생성자가 없으므로 기본 생성자는 기본으로 생성됨.
2) @Table은 DB에서 맵핑할 Table의 이름을 지정할 수 있습니다.
@Table(name = "memo")
3) @Column은 필드와 맵핑할 Table의 컬럼을 지정
nullable이 true일 경우 null 허용 , false일 경우 null 미허용.
unique가 true일 경우 데이터 중복값 미허용, false일 경우 허용.
@Column(name = "username", nullable = false, unique = true)
private String username;
4) @Id는 Entity를 구분할 때 사용하며, table의 Primary Key를 지정해준다.
Entity Class 마다 @Id를 반드시 지정해줘야 한다.
@Entity(name = "memo") // JPA가 관리할 수 있는 Entity 클래스 지정
@Table(name = "memo") // 매핑할 테이블의 이름을 지정
public class Memo {
    @Id
    private Long id;

    // nullable: null 허용 여부
    // unique: 중복 허용 여부 (false 일때 중복 허용)
    @Column(name = "username", nullable = false, unique = true)
    private String username;

    // length: 컬럼 길이 지정
    @Column(name = "contents", nullable = false, length = 500)
    private String contents;
}
의존성 추가하기 (build.gradle)
    // JPA 구현체인 hibernate
    implementation 'org.hibernate:hibernate-core:6.1.7.Final'
    // MySQL
    implementation 'mysql:mysql-connector-java:8.0.28'
DB 연동, Test class 생성하기

import jakarta.persistence.EntityManager;
import jakarta.persistence.EntityManagerFactory;
import jakarta.persistence.Persistence;
import org.junit.jupiter.api.BeforeEach;
import org.junit.jupiter.api.Test;

public class EntityTest {

    EntityManagerFactory emf;
    EntityManager em;

    @BeforeEach
    void setUp() {
        emf = Persistence.createEntityManagerFactory("memo");
        em = emf.createEntityManager();
    }

    @Test
    void test1() {

    }
}
resources - META-INF(디렉터리) 생성
해당 디렉터리 내에 persistence.xml 생성
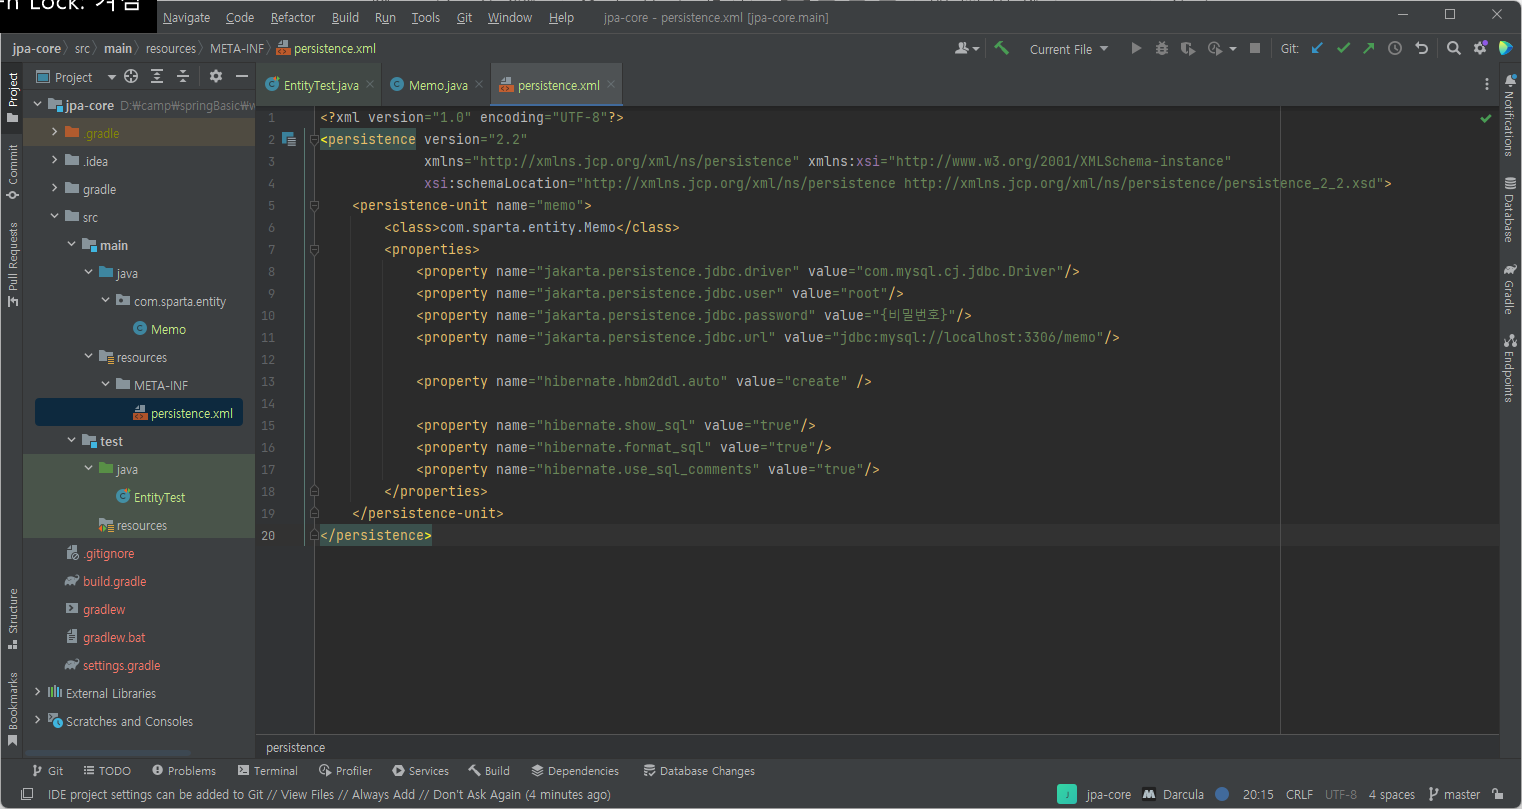
아래 코드에서 각자 비밀번호 입력하기
1. Entitiy Class로 관리할 Class 경로 기재
<class>com.sparta.entity.Memo</class>
2. DB 정보 기재 (Spring 환경이 아닌 Java 환경의 Project이므로 해당 .xml에 기재해야 한다.
3. 아래 코드는 Hibernate에서 SQL을 자동으로 만들어 주는데, 해당 SQL을 보기 좋게 만들어주는 옵션이다.
<property name="hibernate.show_sql" value="true"/>
<property name="hibernate.format_sql" value="true"/>
<property name="hibernate.use_sql_comments" value="true"/>
<?xml version="1.0" encoding="UTF-8"?>
<persistence version="2.2"
             xmlns="http://xmlns.jcp.org/xml/ns/persistence" xmlns:xsi="http://www.w3.org/2001/XMLSchema-instance"
             xsi:schemaLocation="http://xmlns.jcp.org/xml/ns/persistence http://xmlns.jcp.org/xml/ns/persistence/persistence_2_2.xsd">
    <persistence-unit name="memo">
        <class>com.sparta.entity.Memo</class>
        <properties>
            <property name="jakarta.persistence.jdbc.driver" value="com.mysql.cj.jdbc.Driver"/>
            <property name="jakarta.persistence.jdbc.user" value="root"/>
            <property name="jakarta.persistence.jdbc.password" value="{비밀번호}"/>
            <property name="jakarta.persistence.jdbc.url" value="jdbc:mysql://localhost:3306/memo"/>

            <property name="hibernate.hbm2ddl.auto" value="create" />

            <property name="hibernate.show_sql" value="true"/>
            <property name="hibernate.format_sql" value="true"/>
            <property name="hibernate.use_sql_comments" value="true"/>
        </properties>
    </persistence-unit>
</persistence>
결과 :
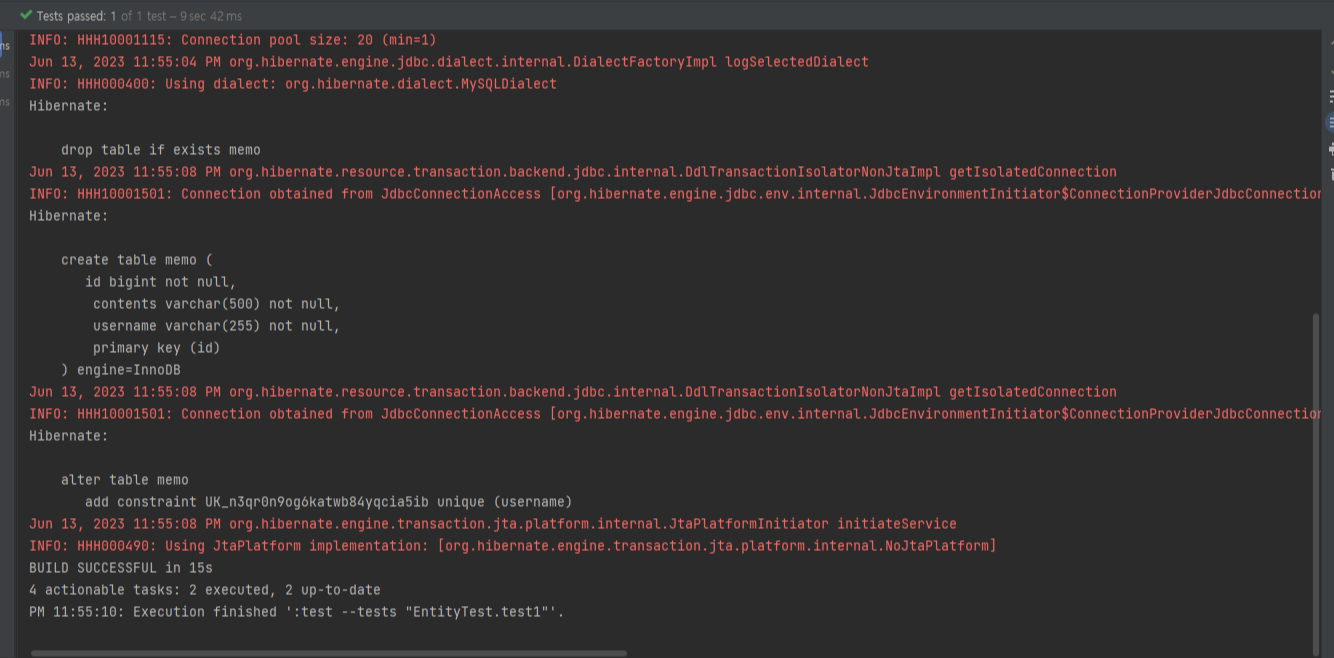
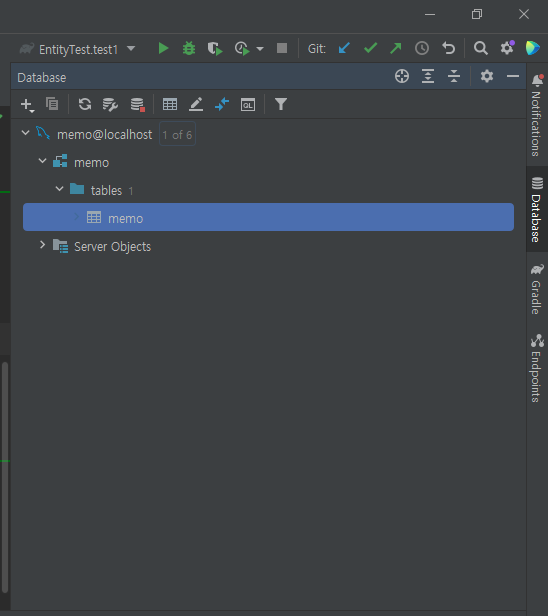
JPA가 해당 정보를 읽고 table을 만들어준다.
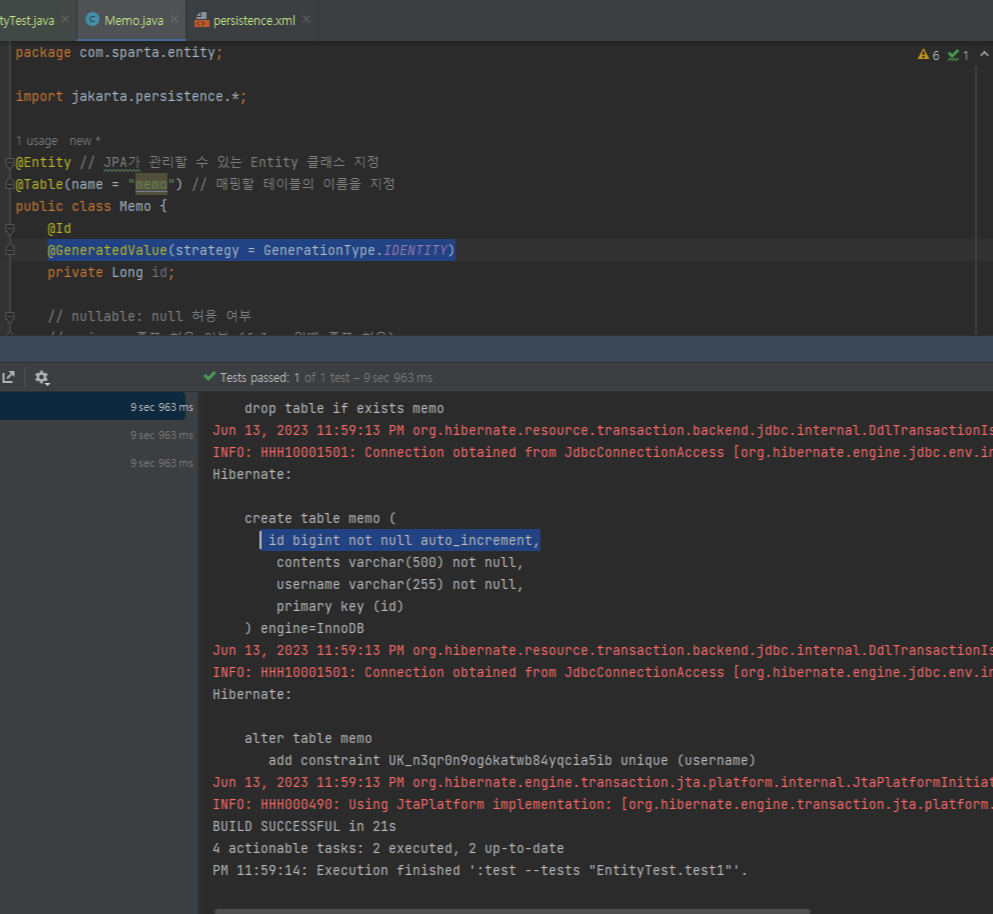
4. auto increment 속성 추가
아래 코드로 할 경우 table create 시 auto increment를 추가할 수 있음.
@Id
@GeneratedValue(strategy = GenerationType.IDENTITY)
package com.sparta.entity;

import jakarta.persistence.*;

@Entity // JPA가 관리할 수 있는 Entity 클래스 지정
@Table(name = "memo") // 매핑할 테이블의 이름을 지정
public class Memo {
    @Id
    @GeneratedValue(strategy = GenerationType.IDENTITY)
    private Long id;

    --이하 생략--
}
'내배캠 주요 학습 > Spring 입문' 카테고리의 다른 글
| 영속성 컨텍스트 활용 - persist() , find() , remove() (0) | 2023.06.14 |
|---|---|
| 영속성 컨텍스트 (0) | 2023.06.14 |
| @Service와 @Repository (0) | 2023.06.13 |
| IoC와 DI(의존성 주입) (0) | 2023.06.13 |
| 스프링 부트 JDBC 활용하기 (1) | 2023.06.13 |


